The latest Zimventure, Dungeon Rustlers, is a video game that I’ve been co-developing with my friend Derrick Schommer. We used Game Maker Studio 2 for the development platform. It has many useful features and one in particular we’ll talk about today: custom shaders.
In Dungeon Rustlers, I wanted the player to still be able to see sprites when they were behind certain tiles. Within a level, there were tiles that the player and enemies could walk behind – such as pillars. In addition, some levels have multiple tiers with the possibility for catwalks covering lower tiers.
IMPORTANT NOTE (edit from 1/19/2018)
In Dungeon Rustlers we did not use objects for in-level props. Instead, everything was based on tiles, using tile-based collision techniques. The occlusion methods described in this article only apply to tile-based collision systems.
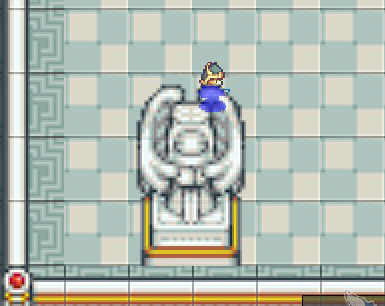
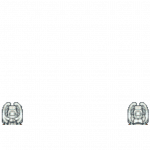
So, what is the problem we’re trying to solve? When the player (or any NPC) walks “behind” something in the level, we’d like see a silhouette rather than nothing. Here’s an example of the problem, notice how the player disappears behind the statues.
Not cool! We want to be able to see that the player is behind the statue.
Silhouettes, Surfaces and Shaders – Oh My!
The core goal of this idea is to NOT draw pixels of the occluded sprite and instead, draw some type of silhouette. We pull this off using the following steps:
- Draw occluding tiles (statues, pillars, upper tiered floors) to an occlusion surface
- Draw actors (player, enemies, portals) to an actor surface
- Blend the two surfaces together with a custom shader – drawing silhouettes where appropriate
If you aren’t familiar with surfaces in GameMaker Stuido – I highly suggest you get acquainted with them before continuing any further.
The Occlusion Surface
Each game step, every tile which can occlude other objects, will need to render itself to a special surface – the occlusion surface.
The occlusion surface is allocated at the start of the room and is the size of the application surface. A reference to the surface is stored in a global variable because it will be referenced by other objects in random code locations. For Dungeon Rustlers, I used a persistent “game manger” object which handles this type of global work.
Note to self: Wrapping this in scripts would be a nice bit of cleanup work!
global.occlusion_surface =
surface_create(surface_get_width(application_surface),
               surface_get_height(application_surface));
Wherever you create the occlusion surface, also create a parameter which will allow binding the occlusion surface to a shader variable. In this example, shader_silhouette is our shader, and u_OcclusionMask is the name of the sampler2D variable that is defined in the shader.
u_OcclusionMask = shader_get_sampler_index(shader_silhouette,
                                           "u_OcclusionMask");
Each game cycle, the occlusion surface will need to be cleared. This happens in the pre-draw event.
// If the occlusion surface was lost: recreate it.
if(!surface_exists(global.occlusion_surface)) {
     surface_free(global.occlusion_surface);
     global.occlusion_surface =
     surface_create(surface_get_width(application_surface),
                    surface_get_height(application_surface));
}
surface_set_target(global.occlusion_surface);
draw_clear_alpha(c_black, 0.0);
surface_reset_target();
Each tilemap that is capable of occluding an actor must render itself to the occlusion map.
surface_set_target(global.occlusion_surface);
draw_sprite(sprite_index, image_index,
x - camera_get_view_x(view_camera[0]),
y - camera_get_view_y(view_camera[0]));
surface_reset_target();
Note that you may have specific tilemaps which are capable of performing occlusion (we did in Dungeon Rustlers). If that’s the case, the following magic will work:
surface_set_target(global.occlusion_surface);
draw_tilemap(<your tilemap>,
       0 - camera_get_view_x(view_camera[0]),
       0 - camera_get_view_y(view_camera[0]));
surface_reset_target();
In both of the examples above, you’ll note that the location where the sprite and tilemap is drawn is offset by the current camera location. Tilemaps are an all-or-nothing drawing proposition, so they always start at 0,0 as the initial draw point. Object sprites, however, will start with their current world coordinates (x,y) as origin for drawing.
Debug tip
Not sure if your occlusion map is being created properly? Draw it on-screen to find out! Add the following code to your Draw GUI event (I used my Game Manager object’s Draw GUI) to see the surface in real-time.
var scale = 0.25;
draw_surface_ext(global.occlusion_surface,
                 0, 0, scale, scale, 0, c_white, 1.0);
draw_set_color(c_white);
draw_rectangle(0, 0, room_width * scale, room_height * scale, true);
The Actor Surface
Now that we have a surface to mask against, it’s time to create a surface of actors. Much like the occlusion surface, the actor surface is managed with a global variable. It’s cleared each game step and every object that can be occluded will draw itself to it.
In the room start – create the surface:
global.actor_surface =
surface_create(surface_get_width(application_surface),
               surface_get_height(application_surface));
In the pre-draw event, clear the surface:
// If the actor surface was lost - recreate it
if(!surface_exists(global.actor_surface)) {
     surface_free(global.actor_surface);
     global.actor_surface =
       surface_create(surface_get_width(application_surface),
                      surface_get_height(application_surface));
}
// Clear the alpha surface
surface_set_target(global.actor_surface);
draw_clear_alpha(c_black, 0.0);
surface_reset_target();
In the draw event for each actor:
surface_set_target(global.actor_surface);
gpu_set_fog(true, make_color_rgb(255, 255, 255), 0, 0);
draw_sprite(sprite_index, image_index,
            x - camera_get_view_x(view_camera[0]),
            y - camera_get_view_y(view_camera[0]));
gpu_set_fog(false, c_black, 0, 0);
surface_reset_target();
You’ll note that in this draw event, we’re setting the fog parameter prior to drawing the sprite. The fog will actually be used as the silhouette color.
The same debugging tip applies for the actor surface as the occlusion surface. Just be sure to render it on a different part of the screen!
Will It Blend?
Let’s take a look at the surfaces we now have to work with. Below is a snapshot of three surfaces: The application surface, the occolusion surface, and the actor surface.
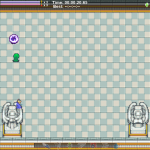
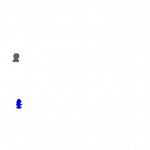
The basic idea for this phase is as follows:
For each pixel, blend the occlusion surface’s alpha component with the alpha component of the actor surface. Take the resultant alpha component and draw that, along with the color from the actor surface.
In the example above, the occlusion surface is mostly blank (alpha = 0.0) with the notable exception of the statues. When the player walks “behind” that statues, its silhouette is drawn on the actor surface at the same location – thus causing the pixels to overlap if we were to lay the two surfaces on top of each other.
Executing the Fragment Shader
Each game cycle, the silhouette shader must be executed, blending the occlusion and actor surfaces which will then be rendered on top of the application surface. This occurs in our game’s persistent “manager object”.
IMPORTANT NOTE: The game manager object’s depth value should be as LOW as possible to ensure it’s the last object that GameMaker draws in the render cycle.
Here is the code which activates the shader and mixes the two surfaces.
shader_set(shader_silhouette);
texture_set_stage(u_OcclusionMask, surface_get_texture(global.occlusion_surface));
draw_surface(global.actor_surface,
             camera_get_view_x(view_camera[0]),
             camera_get_view_y(view_camera[0]));
shader_reset();
The Fragment Shader
Remember, our goal here is to only render a pixel from the actor surface if the same pixel on the occlusion surface has an alpha greater than zero.
//
// Blending shader for silhouettes
//
varying vec2 v_vTexcoord;
varying vec4 v_vColour;
uniform sampler2D u_OcclusionMask;
void main()
{
   // Add the alpha component of the occlusion mask and the actor mask,
   // then subtract 1.
   // If both masks have something to draw, alpha component should be > 0.
   float alpha = texture2D(u_OcclusionMask,
                           v_vTexcoord).a +
                           texture2D(gm_BaseTexture, v_vTexcoord).a - 1.5;
   // Use the color from the actor mask, and the computed alpha mask.
   gl_FragColor = vec4(texture2D(gm_BaseTexture, v_vTexcoord ).rgb,
                       alpha);
}
The shader uses the color data from the actor surface. The alpha data, however, will be computed from both the actor surface and the occlusion surface.
The out alpha value is computed as follows:
output_alpha = occlusion_surface_alpha + actor_surface_alpha – 1.5;
Example
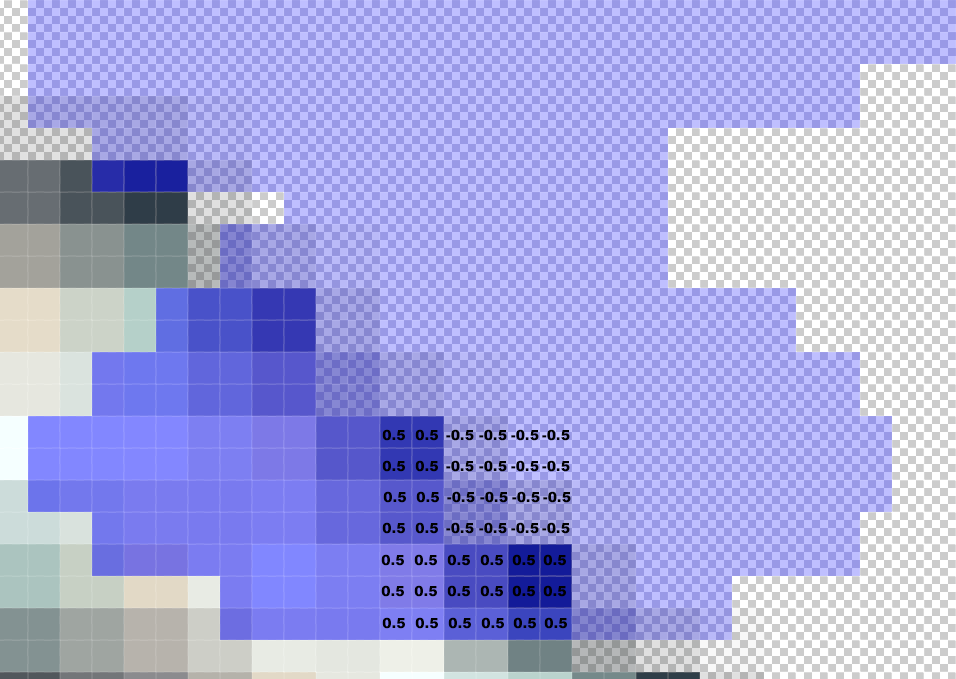
Let’s imagine a pixel of the actor surface is overlapping the occlusion surface. The resulting math will be:
output_alpha = 1.0 + 1.0 – 1.5;
The output alpha is 0.5 in this scenario.
If the player’s silhouette isn’t behind a statue, meaning the current pixel on the occlusion surface is blank, then the resulting math will be:
output_alpha = 0.0 + 1.0 – 1.5;
The output alpha is -0.5 in this case – the output won’t be visible.
Note: we could clamp this value to 0-1 if we were being extra-awesome.
If we were to visualize this, let’s zoom in on the surfaces being drawn to the top right of the statue. In the small grid, you’ll see the output alpha component that is computed for each pixel (or accurately, per textel).
Why 1.5?
Why do we subtract 1.5 from the difference between the alpha component of the two surfaces? The reason is that we want the output alpha to be semi-transparent. If only 1.0 was subtracted, the output would be zero or one. That would still work, but the silhouette would be drawn completely opaque and we wouldn’t see any of the statue. By using 1.5, the silhouette is semi-transparent and appears to be “under” the statue.
The Final Result
If everything goes as planned, at this point you should be walking behind tiles with your fancy new silhouette! You’ll see in the example below that this method does indeed offer pixel-perfect occlusion.
Overhead
There is obviously some overhead to this technique but it’s quite minimal.
CPU cycles
Extra game cycles are burned on two extra phases:
- Any tile that can occlude, or be occluded must render itself twice.
- The silhouette surface must be cleared and drawn each frame.
The first step is VERY dependent on how you implement the occlusion map. In Dungeon Rustlers, we actually used tilemap collisions rather than object-to-object collisions for the room geometry. This means each cycle I drew tilemaps to the occlusion surface rather than individual objects.
There were no such shortcuts for rendering actors to the actor surface. Each actor simply draws itself twice. This isn’t a HUGE deal though as GameMaker doesn’t call the draw event for objects which are off-screen.
Memory
For memory consumption, my technique adds two additional surfaces, which are the size of the application surface. If this is a deal-breaker, it’s time to upgrade your computer!
Thanks For Playing
If you found this tutorial useful, please stop by Steam and check out our game, Dungeon Rustlers! If you’ve got any question about this tutorial and how to use it in your game, get in touch via Twitter or use the contact page to send me an email!